Category: Aquarium Setup

  • How To Set up Aquarium For Betta Fish

    How To Set up Aquarium For Betta Fish

    Betta Fish are gorgeous, colorful freshwater fish that are filled with incredible personalities. These fish don’t belong in tiny vases or in a cold, dark room. They should be kept in warm and filtered water with space to stretch their fins and swim around. This article will discuss the equipment and supplies I recommend to set up an aquarium for Betta Fish.

    I always encourage fishkeepers to go to their local fish store to purchase supplies. Many small and local fish stores have a great selection of plants, driftwood, fish, and, best of all, knowledge. Many do their best to provide great information to care for their animals. Unfortunately, shopping in a store is not always possible, so online shopping is the next best thing. I have curated a list of equipment and supplies you can purchase online to set up an aquarium for Betta Fish.

    Affiliate Link Disclaimer

    This page contains links to affiliate products. Click on this box to learn more.

    List Of Equipment and Supplies

    There’s a lot that goes into an aquarium, and it could get a little intimidating for first-time aquarists. I’ll try to make this setup guide as straightforward as possible. All the equipment and supplies I recommend for keeping a Betta Fish will be listed. It’ll be a beginner-friendly fish tank and will utilize live plants that are easy to care for. An explanation will be provided for why I recommend equipment and supplies. The following is what you’ll need to get your fish tank up and running before even thinking of adding a fish.

    The following are supplies, decorations, and other items I highly recommend to help increase your chance of keeping a successfully running fish tank. These items include things to monitor your water parameters and to make tank maintenance a little easier.

    You can pick and choose what equipment you’ll need, but these are my highly suggested items. If there is a brand you prefer using, by all means, use that brand. I am sharing what has worked well for me. I also recommend always buying from your local fish store if possible. They work hard to keep this hobby available to us. If you do not have a mom-and-pop fish store near you, then consider picking up equipment and supplies online. I will always appreciate your support if you click and purchase items from the affiliate links provided.

    Aquarium, Aquarium Stand, Lid, & Background

    Technically speaking, Betta Fish can be kept in a minimum of 5 gallons of water. However, more space for a fish is always recommended. I suggest keeping a Betta in at least 10 gallons of water. They move a lot more than you might think, and larger water volumes often mean more stable water parameters. For this setup, we will be using the Aqueon 10-gallon fish tank. I have used Aqueon fish tanks all my life. They are sturdy and have a track record of being great aquariums (at least for me).

    Many aquariums can be purchased with a stand. The important thing when putting a fish tank on a stand, table, or other furniture is knowing the limitations of what you’re putting it on. The water volume of a 10-gallon fish tank will weigh at least 80 lbs, and not all furniture is built to hold that kind of weight.

    For example, you can put the fish tank on a dresser, just make sure the dresser can hold the weight, won’t sag over time due to the weight, and won’t warp and transform if you accidentally spill water on it. If you’re questioning the weight and durability of the furniture you plan on using, it’s probably a good idea not to use it. Damage from an aquarium blowout can be expensive, so it’s not worth risking it.

    Aquarium lids and backgrounds are pretty straightforward. Betta Fish can jump out of an aquarium, so a lid is recommended. Aqueon has glass lids made to fit their frame, but you can also make or purchase a custom lid. Floating plants are sometimes used instead of lids, but it’s not guaranteed they’ll stop a fish from jumping out. I make very simple backgrounds with black paper purchased from a dollar store. I simply cut it to size and tape it to the back. It’s easily replaceable if it gets wet, and it is negligible in cost. However, use whatever background makes you happy.

    Aquarium Filter

    For a Betta Fish aquarium, especially for one that will be set up with aquarium plants, I recommend a sponge filter. There are a few reasons for this. Betta Fish have nice flowy fins that can theoretically get sucked into the intake of a hang-on back or canister filter. A sponge filter removes that possibility almost entirely. Sponge filters move air through a tube. That’s literally all they do. So a Betta cannot get sucked into one. You can learn a few things about sponge filters by checking out Sponge Filter Use, Cleaning, and Extra Tips.

    Downside to Sponge Filters

    There are a few downsides to a sponge filter (in my opinion). The first being that they only provide biological filtration. Bacteria will populate the sponge, which is fantastic, but that’s all it’ll do. There is no mechanical or chemical filtration. Regardless, bacteria are really important in keeping your nitrogen cycle in check, so it’s fantastic that bacteria colonize the surface area of a sponge. Luckily for this setup, plants and water changes should fill the gap of not having mechanical or chemical filtration.

    The other downside is the size. I personally don’t like how much space a sponge filter uses in an aquarium. I prefer a small tube of a hang-on back filter over a sponge that takes up space. For the sake of a Betta, I’ll look passed it and use a sponge filter.

    Aquarium Heater

    Heaters are the pieces of equipment that are likely to malfunction in an aquarium. When you mix a device that produces a lot of heat at short intervals, it’s bound to happen. Regardless, they are often a necessary aspect of fish keeping. My go-to heaters are the Fluval M-Series Heaters and the Aqueon Pro Heaters. These have treated me well in the past, but I understand that everyone has a different story with the quality of heaters, and what has worked for me may not be the same for someone else. You can learn about some of my favorite heaters by reading 6 Best Aquarium Heaters for Freshwater & Saltwater Fish Tanks.

    Aquarium Light & Power Strip

    Since we are growing plants in this enclosure, it will need a light that can help plants grow. Luckily, we will be sticking to beginner-friendly plants that won’t require high-intensity lighting. For an aquarium like this, a budget-friendly NICREW 20″ SkyLED light might do the trick. If you’re looking for something on the higher end, with more versatility and customization, consider the FZONE LED Aquarium Light. This light has an app that allows you to customize colors and intensities, which really lets you nerd out with your fish tank.

    This aquarium will have at least three pieces of equipment that consume electricity. I suggest getting a good power strip for it. I listed the Amazon Basics Power Strip above. They are generally reliable and rated quite high in quality. You might have a good power strip lying around your house that’ll work for this setup. When running electrical cords and wires around aquariums, remember to set them up with a drip loop to prevent water from reaching the outlet.

    Substrate

    Sandy substrate or gravel is what I recommend for most aquariums, especially ones with plants growing in them. I provided CaribSea Eco-Complete Black Gravel as a suggestion, but most brands will work. The black gravel should make your fish and plants pop in color compared to lighter gravels that reflect color and wash out the surroundings. If you’re a beginner aquarist, gravel may be the better choice. Gravel does a better job of anchoring plants in place. Sand is just a little harder to work with when putting in plants.

    I have gone a very cheap route and set up an aquarium with pool filter sand. You can get a 50 lb bag of HTH Pool Filter Sand for roughly 15$, which is quite cheap compared to other substrates. Not all sands are made the same. Certain ones have high levels of silicates and are not as clean. Play sand is a great example of this, and I would not use that for an aquarium. If you decide to use pool filter sand, thoroughly rinse the sand before adding it to an aquarium. Otherwise, it may take a long time for your aquarium to clear up.

    Live Plants & Driftwood

    Aquarium plants chosen for this setup will be easy to care for. Most of these don’t require anything besides fish waste and decent lighting to prosper. I have an article devoted to beginner-friendly aquarium plants, it’s called 10 Best Aquarium Plants For Beginners. For this fish tank, I’d use Anubias, Crypts, Java Fern, Salvinia minima, and a species of moss to grow on driftwood.

    Betta Fish love to rest on or under leaves, which makes Anubias and Java Fern a perfect option. Crypts grow fairly quickly and often form large bunches, which is great for filling up space. Salvinia minima is a floating plant that is great at soaking up nutrients and also provides a barrier between the surface and water. This will hopefully lower the risk of your Betta jumping out of an aquarium. The moss is self-explanatory; glue it or tie it to a piece of driftwood and watch it grow. There are many plant options; choose which catches your eye, but look into the plant’s needs before purchasing.

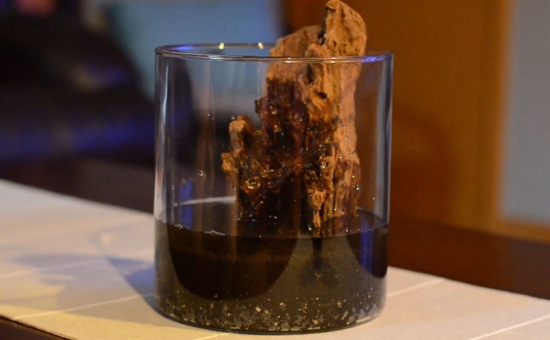
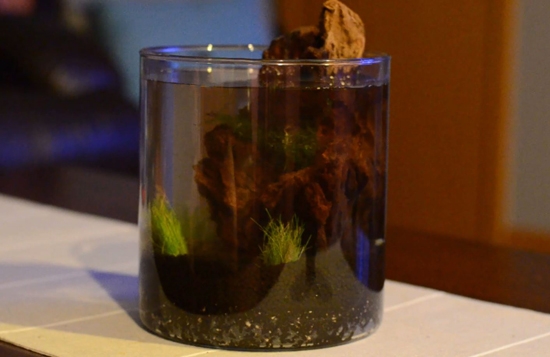
    Most driftwood found in a fish store should be good to go. The only precaution I would advise is to be careful about sharper-edged pieces of driftwood. It’s unlikely, but the sharp edges can snag a Betta’s fin and damage them. Driftwood also has a strong possibility of releasing tannins into the water. They aren’t dangerous and instead are beneficial to a fish tank. The downside to tannins is that they change your aquarium into a brown, tea color.

    API Freshwater Master Test Kit & Water Conditioner

    A freshwater test kit will be a necessity for your brand-new aquarium. Your fish tank will go through the nitrogen cycle. The cycle essentially creates a “safe” habitat for your fish. The cycle typically progresses through an ammonia stage, a nitrite stage, and concludes with a nitrate stage. Nitrite-producing bacteria consume ammonia, and nitrite-consuming bacteria produce nitrates. Ammonia and nitrites are toxic to fish. Nitrates can also be dangerous to fish at high levels. This is why it’s important to have a test kit on hand to make sure you’re not adding fish into an aquarium actively going through the nitrogen cycle.

    After your fish tank is cycled, the solution to removing nitrates is simply water changes. Usually, a 10-20% water change will help lower nitrates. I do not recommend doing 100% water changes, and do not take everything out of your fish tank to “clean it”. This will more than likely crash your fish tank’s bacterial colony, completely crashing your aquarium. The only thing you’ll likely need to take out of the fish tank when cleaning is the sponge. Either when it gets gunked up or is falling apart. Gunked-up sponges can be rinsed through old aquarium water, or some people suggest simply running them through the tap for a quick rinse.

    Many of us live in cities with municipal water. The water from this kind of tap water likely has chlorines and chloramines, which are good for us but bad for fish. A water conditioner is designed to remove harmful chemicals like chlorine and chloramine. SeaChem Prime is generally easy to use and will help us achieve the goal of removing chlorine and chloramine from the water. Use a water conditioner every time you add water to your fish tank.

    Fish Net & Fish Food

    Fish nets and fish food are self-explanatory. The net will be used to put the fish into the aquarium or to remove it, if needed. Your Betta will need to be fed, and that’s where the fish food comes in. Having a variety of food is important to give your fish a range of nutrition. I recommend a combination of flake food, bloodworms, Fluval Bug Bites, or any combination that fits your style.

    Gravel Vacuum & Buckets

    A few other things that are fairly straightforward are the gravel vacuum and buckets. I suggest getting at least two buckets. One to remove water and one to add clean water. The gravel vacuum will be used to conduct water changes. The end of the gravel vacuum will sift gunk out of the substrate and remove it from the aquarium.

    Putting it all Together

    So we have all our supplies. It’s time to put it all together. If you have an aquarium stand for your fish tank, put it where you think it should go. I suggest keeping your aquarium away from doors that lead to the outside and windows. Drafts from open doors in the winter aren’t good for the temperature stability of a fish tank, and an aquarium near a window sounds like an algae nightmare waiting to happen.

    Even though it’s only a 10-gallon aquarium, it could do some damage if it springs a leak or is defective. Some people might suggest filling the aquarium up with only water and having it sit for a day or two to see if it is defective. I usually do this with larger aquariums, and I haven’t done it with small aquariums. A leak can happen at any moment, and from what I have seen, it’s more common in larger fish tanks. If you’re testing your fish tank, consider doing it somewhere outside, in a garage, or somewhere where floor damage is not possible.

    Decorations & Equipment Setup

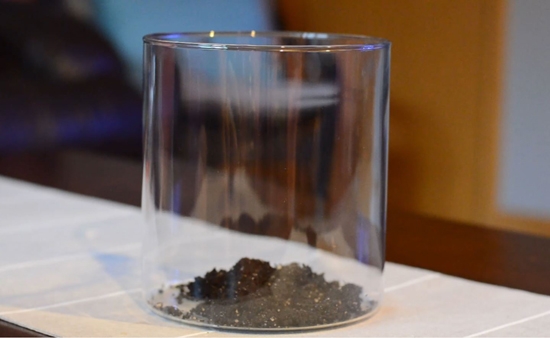
    Once the stand and aquarium are in place, I usually start adding the rinsed (if rinsing is applicable) substrate. While this is happening, I am simultaneously thinking about how I plan on decorating the aquarium. I don’t bother putting on the lights and lid yet because that will likely get moved around while decorating.

    You can connect your sponge filter to the airline tube and check valve, and put it in its place. You can connect it to the air pump and test to see if it works. Put the heater into its permanent location, but do not turn it on until you have water in the fish tank. You’re asking for trouble if you plug your heater in with no water.

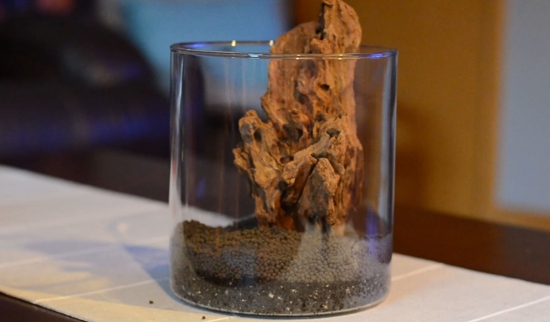
    Add your other decorations, such as driftwood and rocks. Do this after adding enough water to saturate the substrate, and begin adding your plants. I recommend placing taller plants, such as Java Fern and Crypts in the back and shorter plants in the front. If you purchased floating plants, don’t add them until the aquarium is filled with water.

    Wrap it all up

    Finish filling the fish tank up with water, if you haven’t done so, dial your heater to the temperature you want it set at and turn it on. Place your thermometer, and add water conditioner into the aquarium. Now you can place your lid (if you have one) and light on top.

    If you have an older and more established fish tank, you can add filter media from that fish tank into the new one to help jump-start the nitrogen cycle. It could cut the cycle down by weeks, so you can hopefully add your betta sooner. If you don’t have an older aquarium, I usually sprinkle some food into the fish tank to give bacteria something to feed on. This is the start of your nitrogen cycle. It usually lasts around 6 weeks, but it’s important to monitor the progress with the Freshwater Master Test Kit.

    Final Notes

    Setting up a 10-gallon betta tank is all about creating a balanced, comfortable, and enriching environment where your fish can thrive. By choosing the right equipment, maintaining stable water parameters, adding safe décor and live plants, and allowing the tank to cycle before introducing your betta, you’re setting the stage for a healthy and vibrant aquarium. With consistent care and attention, your 10-gallon tank will not only showcase your betta’s natural beauty and personality but also provide a stable home where it can live a long, active life.

  • How to Setup an Aquarium For Neolamprologus multifasciatus

    Neolamprologus multifasciatus is a unique freshwater fish and is one of the smallest species of cichlid that can be kept in an aquarium. What makes these fish incredibly unique is their behavior. Multis are a shell dweller cichlid species normally found in Lake Tanganyika, which is a lake located in Africa. Their behaviors and hardy personalities make them fantastic for fishkeepers looking to keep something a little different. This article will discuss the process of setting up an aquarium for multifasciatus cichlids. I’ll provide a list of equipment and supplies they will likely need, and discuss more about these incredible fish.

    Affiliate Link Disclaimer

    This page contains links to affiliate products. Click on this box to learn more.

    List of Supplies & Equipment

    Multis are not an incredibly challenging fish to keep. These fish are fairly hardy and do not require elaborate aquarium setups. Also, once settled in a fish tank, you’ll likely see them breed. You might get tired of them breeding, similarly to how we get tired of Guppies breeding in a fish tank. The following is a list of equipment I suggest for these shell dwellers. You’ll likely want to have all of these supplies and equipment before assembling the entire aquarium.

    There are additional supplies that are highly recommended when setting up an aquarium and are essential for keeping it running smoothly. The following are supplies, decorations, and other things I recommend for your shell dweller fish tank. I’ll discuss the musts (in my opinion) and things you could get by without.

    As you can see, the list of supplies is pretty extensive. If you’re currently a fishkeeper, you may already have a good portion of these supplies. However, if you’re not, you will likely be spending some money to get everything you need.

    Aquarium & Aquarium Stand

    The first thing you’ll need to acquire for this setup is an aquarium and an aquarium stand. The aquariums that are easiest for me to acquire are Aqueon aquariums. They are generally great quality and a good price. I highly suggest picking up a fish tank from a fish store, instead of online. Glass and shipping don’t mix well together, so it’s better to buy one at the store. For shell dwellers, I recommend providing at least a 20-gallon long fish tank. Shell dwellers do better with more length and width in an aquarium than height. This is because they spend most of their time around the sandbed with their shells.

    Buying a used aquarium and stand is also an option. You’ll have to be careful with used aquariums because they may have issues due to previous use and age. You’ll also want to make sure whatever you use for a stand can hold a 20-gallon aquarium. Remember, 20 gallons of water will weigh about 160 lbs. Whatever you put the aquarium on will have to be able to hold that weight for a long time. Cheap material may bend and bow under the weight of the fish tank, which may eventually lead the aquarium to collapse. Also, make sure your aquarium is level to lower the chance of a blowout.

    Aquarium Lid & Light

    Shellies are not inherently known to jump, but technically, just about all fish can jump out of an aquarium. A glass top can do wonders to help prevent that. A glass top will also lower evaporation in the fish tank, which will also lower how much you have to top off the water. If you’re into custom lids, consider checking out GCInnovations’ custom 20-gallon long lid on Etsy. They currently make a lid for Aqueon and Imagitarium. Be sure to purchase the correct one if you go this route.

    Due to the harshness of the water parameters, many plants will not prosper in this aquarium. Shellies enjoy alkaline water with higher levels of water hardness and increased pH levels. Most plants prefer soft and acidic waters. So they are, for the most part, incompatible. Shell Dweller Cichlids, like Multis, also move shells and sand around. This will make the substrate a pretty inhospitable place for plants, and you’ll likely see them get uprooted constantly. What I am trying to explain is that these fish don’t need the fanciest lights to be happy because you probably won’t be growing plants in the aquarium. Any aquarium light should do perfectly fine over the fish tank. However, if you’re inclined to add some kind of plants, consider trying any of the 10 Best Aquarium Plants For Beginners. These plants are hardy, robust, and can handle some neglect. If any plants will succeed in this setup, it’s floating plants.

    Aquarium Backgrounds

    I am a cheap person and do what I can to save costs where possible in this hobby. Aquarium backgrounds are one of the things I usually go cheap on. I usually go to the Dollar Store or craft store and buy a large piece of black paper for the background. I then use scotch tape to tape the paper to the back of the fish tank. This has worked well for me, and I suggest you give it a try if you’re trying to save some money. However, don’t let me stop you from buying a background that’s better suited for your setup.

    Aquarium Heaters

    Shell Dwellers enjoy nice warm water. They do best under water temperatures ranging between 75°F and 80°F. Having a heater in the aquarium is crucial for keeping these fish healthy and happy. There are many heater options available. Take a look at the 6 Best Aquarium Heaters for Freshwater & Saltwater Fish Tanks to see some of the best options out there. I provided a link to the Fluval M-Series Heater earlier in this article. I enjoy using these, and they’re often my go-to choice for heaters. The 100W version of this heater is rated for aquariums up to 30 gallons, so it should provide plenty of power to keep your aquarium warm. Don’t forget to pick up an internal thermometer as well to keep an eye on the temperature.

    Aquarium Filter Options

    For aquarium filters, we can go two different routes. The first option that many people take is using a sponge filter. The reason many people use sponge filters for shell dweller aquariums is that fry (baby fish) cannot get sucked up into a sponge filter, unlike with a hang-on-back filter. Multis also tend to move sand around, and a sponge filter will not get clogged up from the sand because it does not have a motor. If you choose to go the sponge filter route, take a look at Sponge Filter Use, Cleaning, and Extra Tips for some information on them. If you purchase a sponge filter, you will also need to purchase an air pump to allow water to move through it.

    The other route that I recommend for a 20-gallon long shell dweller aquarium is to use a hang-on back filter with a prefilter covering the intake tube. I have grown to love the Seachem Tidal line of aquarium filters. They come loaded with a bunch of features that put them on top of my list of best aquarium power filters. Choose a filter that works best for you. I enjoy all the bells and whistles that come with filters. However, you may be someone who enjoys a more basic filter setup and do not need all the features. Check out the 7 Best Hang On the Back Power Filters for Freshwater Aquariums to see some of the best HOB filters on the market. You can purchase 12 pieces of Black Prefilter Sponge (affiliate link) to cover your filter intake tube. The Seachem Tidal 35 is the smallest size you can purchase. Luckily, the filter has adjustable flow rates, so you can slow down how much water gets pushed through the aquarium.

    Substrate For Aquarium, Escargot Shells, and Texas Holey Rock

    I chose the CaribSea Ivory Coast Sand for a few reasons. It looks cool with the black and white grains of sand, and it adds a unique touch of color to the aquarium. The main reason I chose this sand over other sands is that it aids in buffering your fish tank. This sand helps keep pH levels from dropping and assists in maintaining proper water parameters for your shellies. Some fishkeepers mix this sand with other Aragonite sands for the look and additional buffering capacity. 20 lbs of this sand may or may not be enough for your needs. I added one bag into a 20-gallon long, and felt like I could use more sand.

    Escargot shells are not the natural shells of shellies. The native shell species that shell dwellers use are incredibly expensive and hard to find. These are the next best thing. Regardless, shells are a must-have for your shellies. This is what they use for their home. They guard, fight, and constantly battle and switch shells. Without them, they’ll be incredibly stressed and will suffer. I recommend having at least 3 shells per fish. Covering the bottom of your aquarium with shells is probably the best route for this setup.

    Texas Holey Rock is technically not necessary for this setup. I added some into mine for some structure, to hide equipment, and to provide additional buffering. My goal is to try and buffer the water to the proper pH and hardness levels without having to use too many chemicals. Using rock and sand will help with this.

    Seachem Equilibrium & Water Test Kits

    If you have naturally occurring hard water, you may not need to buffer your aquarium water at all. I use RO water for all my fish tanks because I do not have the cleanest water out of the tap. This means buffering for pH and hardness will likely be a necessity. Seachem Equilibrium is the mineral buffer that I recommend to achieve proper GH levels for your aquarium.

    It’s important to test your aquarium water, tap water, and water after buffering agents are added to make sure you’re adding the proper amounts. I use the API Freshwater Master Test Kit for this with the GH test kit to keep an eye on my water parameters.

    Other Accessories & Supplies

    One thing you’ll need is fish food. Multis are predominantly carnivorous, so protein-rich foods are the way to go for them. Fluval Bug Bites, Bloodworms, and micropellets are good options. I would also provide them with crushed-up flake food as a supplement. Giving fish a variety of foods will help provide them with an umbrella of nutrients. One food might lack a certain nutrient that another may provide.

    There are a few other things you’ll need if this is your first time setting up an aquarium. You’ll need nets, buckets, a gravel vacuum, and consider looking into medications and aquarium salt for your fish in case they get sick. One other thing that is often overlooked is a battery-powered air pump. These are useful if you live in an area that loses power often. Fish can handle days without food, but a lack of oxygen due to no water movement can be detrimental to your fish tank.

    What’s Next?

    Before you add any fish into your aquarium, you’ll have to allow your aquarium to go through the nitrogen cycle. This cycle essentially creates the environment for your fish to live in. Your aquarium will go through 3 stages during this cycle. An ammonia stage, nitrite stage, and the nitrate stage, where we want to be. At the end of the cycle, we’ll want to see 0 ammonia, 0 nitrites, and a hint of nitrates. You’ll use the API Freshwater Master Test Kit to keep an eye on the water parameters.

    Stages can take anywhere between 6 to 8 weeks. You’ll need to give bacteria something to feed on. I usually drop some fish food into the aquarium to jump-start the cycle, but this is not a very scientific method of doing things. If you have an aquarium or know someone with an aquarium, ask them for some filter media to help seed your fish tank with bacteria. Seeding the fish tank could help speed up the nitrogen cycle.

    Final Notes

    Shell dwellers are fascinating little fish. At the time of this writing, I am setting up a 20-gallon long for Multis, and I cannot wait to get it stocked. If you’re entering the world of fishkeeping and are looking for a single-species aquarium, consider getting these fish. If not, check out 10 Best Fish For a 20 Gallon Tank – Freshwater Edition to see some other really cool fish that can be kept in a 20-gallon aquarium.

  • How To Setup Planted Aquarium for Neon Tetra

    How To Setup Planted Aquarium for Neon Tetra

    Neon Tetras are some of the most iconic fish in this hobby. Anyone who has walked into a pet store can probably identify that familiar red and blue coloration. Many people choose Neon Tetras because they are commonly found in pet stores, are vibrant in color, and are incredibly cheap. It makes sense why they are so popular. This guide will discuss what you need to set up a planted aquarium for Neon Tetras.

    Aquarium For Neon Tetras

    To set up an enclosure for Neon Tetras, you’ll first want to start with acquiring a fish tank. A small school of Neon Tetras will do great in a 10-gallon fish tank. You’re always welcome to go for a larger aquarium, but I do not recommend going smaller. If you have an aquarium stored away that you’re thinking of using but don’t remember how many gallons of water it holds, check out some of the Standard Aquarium Sizes to figure out what size it is. If you’re planning on only keeping Neon Tetras, and perhaps a few snails or shrimp, 10 Neons should do great in a 10-gallon aquarium.

    Filtration For Aquarium

    The next thing you’ll want to consider when setting up a planted aquarium for Neon Tetras is what type of filtration to use. The most common ones I suggest are sponge filters or power filters, especially for smaller fish tanks. In most cases, Neon Tetra’s bioloads are minimal so a combination of plants, filtration, and water changes should be plenty to keep your aquarium clean.

    Sponge filters will take up some real estate in the fish tank, but are fairly cheap to set up, use a very small amount of electricity, and provide a lot of surface area for beneficial bacteria. All you’ll need to set up a sponge filter, is an air pump, airline tubing, and the sponge filter. Most air pumps come included with airline tubing. If you’re new to the hobby, check out Sponge Filter Use Cleaning and Extra Tips to learn a few things about this type of filtration.

    Sponge Filter Zoomed

    If you want a more in-depth filtration experience consider getting a power filter. There are many types of power filters available to choose from. Most will get the job done but my favorites are the Fluval – Aquaclear Power Filters or the Seachem – Tidal Power Aquarium Filters. I love these filters mostly because of their customizable and large media baskets. You can swap filter media to whatever you desire and they’ll continue to work well. Neon Tetras don’t have an incredibly large bio-load, but it never hurts to have a good filter running on the fish tank. If you’re shopping around for power filters and are not sold on these, take a look at 7 Best Hang-On Back Power Filters For Freshwater Aquariums to see many other options.

    Lights For Plants

    You’ll need to purchase lights for your aquarium that will complement the plants you’re planning on growing. Some plants do better under more intense light while others do great under medium to low light conditions. If you’re new, I’d start with plants that are very tolerant of lower light conditions and that are not incredibly demanding. I have gotten great results growing plants such as vals, crypts, and anubias with the NICREW Full Spectrum Planted LED Light. It’s a great budget light and a solid introduction to LED aquarium lighting.

    Aquarium Heater

    Unless you live in an area where the ambient temperature is always between 72° and 78°F, you’ll likely need an aquarium heater. You’ll have to pick out the one that will work best for your aquarium’s dimensions. There are a lot of brands that make fantastic heaters. If you’re in the market for a heater, take a look at 6 Best Aquarium Heaters for Your Fish Tank. There are many different options to choose from, I have always had good results from the Fluval M-Series Heaters but I have also used many other brands like the Aqueon Pro Series Heaters that have worked great. Remember, that heaters are the pieces of equipment that are likely to fault out in your fish tank.

    You can take precautions by purchasing an Inkbird Temperature Controller to help keep the heater from causing irreversible damage to your fish if it were to malfunction. An internal aquarium thermostat will also give you a good idea of your water temperature.

    Decorations and Plants

    There are plenty of different decorations to choose from when setting up an aquarium. You can add rocks, live plants, driftwood, artificial decor, and more. What type of decorations you choose is entirely up to you. The most important thing is that what you put in the aquarium is fish-safe. I love aquariums that look and feel like a slice of nature, so my fish tanks are usually dominated by plants, wood, and rockwork.

    Substrate

    A substrate is essentially the “ground” of your aquarium. I have seen many different brands, types, colors, and textures of substrates in my years of fishkeeping. However, if you’re considering setting up a planted tank, I assume you’re looking for a natural look to your aquarium. For planted fish tanks, my go-to substrate is CaribSea Eco-Complete. This substrate is nice because its dark color makes the decorations and fish swimming above pop in color. The opposite occurs when you use a white-colored substrate.

    Another great substrate used for planted aquariums is the Fluval Stratum for Freshwater Fish Tanks. I don’t use this one too often, but many fishkeepers and hobbyists love the quality and look it provides. It also comes with the perks of being very porous to help plants root faster and it helps maintain neutral to acidic water parameters. Before choosing a substrate, consider doing some research on the effects it may have on your plants.

    Rocks, Driftwood, etc.

    Adding rocks and driftwood to your fish tank will surely add a natural-looking touch. Some species of plants and mosses can be grown off of driftwood, and plants growing around stones can make your fish tank look incredible. I recommend giving your driftwood and rocks a good rinse before adding them to an aquarium. However, do not use any household chemicals because those can be dangerous for fish and invertebrates.

    Many aquarists boil their driftwood to help remove the tannins they will likely release into your fish tank. Tannins aren’t dangerous, they are actually beneficial for your fish. However, tannins will cause your fish tank water to turn tea color or sometimes even darker than that.

    Certain rocks can alter the water parameters in your fish tank. For example, limestone or Texas Holey Rock will increase your fish tank’s water hardness and pH level. This is fantastic for high pH, hard water-loving fish, but that’s not the case for Neon Tetras. Lava rock and slate are pretty safe options, but there are plenty of rocks out there that won’t alter your water parameters. Unlike driftwood, do not boil or bake your rocks.

    Plants

    This article is specific to setting up a planted tank for Neon Tetras, so I’ll list a handful of plants that are very easy to care for to get someone started.

    • Anubias are a fantastic option for a planted aquarium. They are very tolerant of low light conditions and have beautiful broad leaves. You can wedge them in between driftwood and grow them out of the substrate. If you plant them in substrate, ensure part of its rhizome is exposed. Otherwise, the rhizome will likely rot and eventually kill off the plant.
    • Java Fern is another great option for a planted aquarium, especially when you’re first starting out. It has a lance-shaped leaf and is usually a nice vibrant green color. This plant is also fairly tolerant of lower light conditions. It’s a great choice for a background plant
    • There are many different species of crypts. You’ll see some that’ll grow much taller than others, and you’ll also see a few color variations. This plant usually grows very well in an aquarium and may even dominate parts of a fish tank if you let them grow out. After breaking down an aquarium, i had a singular root run the full length of my fish tank. The aquarium was about 30″ long.
    • You can’t go wrong with attaching mosses to driftwood. The most common you’ll likely see are java moss or Christmas moss. Moss is a great way to grow something green in an aquarium without losing much open swimming space.
    • There are quite a few different species of Val. The most common i see are Jungle Vals, Italian Vals, and Corkscrew Vals. From experience, they grow very easily and they’ll grow to the top of your fish tank. Once they’re acclimated, they will quickly begin growing vertically and horizontally, taking over much of the background of your aquarium.
    • Pearlweed are very easy-to-grow plants that can be added to a planted fish tank. They’re great for backgrounds and will often propagate quickly. A few sometimes can turn into a jungle.

    Adding Neon Tetras into the Aquarium

    Before adding Neon Tetras to your aquarium, guarantee that your fish tank is established and has gone through the Nitrogen Cycle. The Aquarium Co-Op does a great job explaining what the Nitrogen Cycle is. As a quick summary, your aquarium has to go through a nitrogen cycle when it’s first set up. There are different ways to do it, but I suggest a fishless cycle if possible. Even better, if you know someone with an established fish tank, or own one yourself, you can take filter media, substrate, a rock, or any other hard surface (where bacteria can colonize) and put it into the new fish tank. This will seed the new aquarium with beneficial bacteria. Although it will not fully cycle the new fish tank, it should at least speed up the Nitrogen Cycle process.

    The result of your nitrogen cycle will result in your aquarium reading 0 ammonia, and 0 nitrites, and you’ll likely have a hint of nitrates. You can test for these with the API Freshwater Master Test Kit.

    Final Notes

    Neon Tetras are fantastic fish to add to a freshwater aquarium. They look even better in a freshwater planted tank. Their magnificent blue and red color pops in an aquarium full of plants. Due to inbreeding, they’re a little more sensitive than other fish but are still a very sought-after species.

  • Supplies to Setting up a 20 Gallon Saltwater Reef Tank

    Supplies to Setting up a 20 Gallon Saltwater Reef Tank

    Setting up a reef tank may be intimidating for some, but it is a fun and rewarding process, especially if you already have experience with fish keeping. Starting a reef tank, especially larger ones, will have a high upfront cost, but running one successfully should not cost too much more than a freshwater aquarium. This article will discuss the supplies that are either needed and/or optional for setting up a 20-gallon saltwater fish tank. The list will be similar to supplies necessary for a 10-gallon tank, with a few additions.

    Before we begin the list, check out this list of very cool fish that can be kept in a 20-gallon nano reef tank. Not every fish on the list is compatible with one another but it is great to see the variety of fish species available.

    List of Supplies Needed for Aquarium

    If you’re looking to make life easier for yourself, consider picking up an all-in-one aquarium, like the JBJ AIO Rimless 20-gallon, Red Sea Max NANO Cube Complete Reef System, or Waterbox Cube 25 Peninsula Nano AIO Aquarium, to name a few. These three are made to be all in one saltwater fish tanks, but can also be used for freshwater. Prices will vary on all in one fish tanks because each will give you varying amounts of supplies and equipment. For example, the Red Sea Max Nano comes with just about everything hardware-wise to build an aquarium, with a stand included. The Waterbox Cube is a little more barebones and only comes with the aquarium glass and built-in sump filtration system.

    Whether you decide on an all in one aquarium, or purchase an open-top fish tank, I will still cover everything you need to get started. I’ll cover the following equipment and supplies, and let you know whether they are a necessity or optional for your fish tank.

    • Filtration
    • Lighting
    • Hardscape (live rock and sand)
    • Aquarium
    • Water changing
    • Misc. Supplies

    Filtration (needed)

    Filtration will help stabilize your water parameters as well as add necessary flow into your reef tank. With the combination of proper husbandry, your aquarium can thrive for years. On an aquarium this size, you should be able to get away with using a hang on back filter. I would recommend an Aquaclear 70 or larger. Fluval Aquaclear filters are my choice for HOB filters because of their large chamber which is almost entirely customizable. Check out Fluval Aquaclear HOB Filter – Specs, Dimensions, etc. for more information on these filters.

    At a minimum, I would have your filter loaded with AQUANEAT Bio Sponge Filter Pads and Aquaclear BioMax. The filter pads will trap debris and other waste products, and the BioMax provides ample surface area for beneficial bacteria to colonize and grow.

    Filtration (recommended)

    If possible, I would recommend converting the large chamber into a refugium. A refugium is a space in the aquarium that allows algae to grow. It’s a little more work at first because you will need a separate light fixture to grow algae, but long term it’ll help a lot once you get macroalgae, like chaeto, growing in there. Macro algae will consume waste like nitrates and phosphates.

    If you’re not interested in setting up a small refugium in your HOB filter, I recommend Chemi-pure Blue or some form of Activated Carbon media to help remove undesirable contaminants from your water. I would also include the Bio Sponge Filter Media Pad and BioMax listed above. This media and weekly water changes will help keep your water in excellent condition.

    Protein Skimmer (optional)

    At this point, a protein skimmer is likely not needed for your 20 gallon reef tank. I wanted to add it to the list because it is an option. Protein skimmers are great at removing a lot of excess nutrients from the water, but this can be replaced with larger water changes. On a nano fish tank, like a 20 gallon, you’ll only be replacing an extra couple of gallons when conducting water changes. A Protein skimmer is fantastic for larger fish tanks, since you may need to change out anywhere between 10 and 20 gallons per water change. If you’re interested in protein skimmers, there are some internal protein skimmers, like the AQUATICLIFE 115 Mini Internal Protein Skimmer that should get the job done.

    Lighting (needed)

    If you’re looking to grow coral, you will need some type of lighting designed for coral. You do not need a high-end light to grow many different types of coral. There are plenty of budget-friendly lights that will successfully grow coral, but many species of coral, like SPS will require more intense lighting to thrive. You’re welcome to go all out with the Radion G6, which is one of the best LED lighting for reef tanks, or go with something easier on the wallet.

    The NICREW 150W Aquarium LED Reef Light should do very well with a 20-gallon long due to its long spread. It has a max spread of 30″ x 30″ at a depth of 28″. It’s plenty of lighting for a 20-gallon fish tank. I recommend purchasing the NICREW Controller with this light fixture so you can easily program your lights to ramp up and down on their own.

    Heater (needed)

    Most saltwater critters will do best in aquariums with a temperature range between 72°F – 78°F. I would recommend going even further and keeping the water temperature between 76°F and 78°F. It is the heater’s job to get it to that temperature and keep it there. My recommendation for heaters is the Aqueon Pro Heater, it has some of the best quality and its overall build and design are what make it stand out. If you’re shopping around for aquarium heaters, check out the 6 Best Heaters for Freshwater and Saltwater Fish Tanks. If there is anything that will malfunction in an aquarium, it’ll likely be a heater. So It’s good to keep an eye on it and guarantee it is working as it should. I would purchase a thermometer to do so.

    Hardscaping With Live Rock & Live Sand (needed)

    Some sort of hardscape is needed for your 20 gallon reef aquarium. Some fish keepers enjoy an aquarium with more open space while others love to load their reef tank with live rock. I usually recommend about 20 lbs. of live rock for a 20-gallon reef tank. At the end of the day, it’s your choice how much you decide to use. Just remember that live rock is an important part of your aquarium, it houses countless amounts of beneficial bacteria. It also is the home for your fish and the surface your coral will use to grow and spread. If you don’t have a local fish store near you with live rock, check out the Carib Sea Base Rock and/or Nature Ocean Base Rock for live rock.

    Aquarium (needed)

    You will need an aquarium to house all of your rock, sand, fish, and coral. If you’re purchasing an Aqueon or Marineland open-top aquarium, you can choose either a 20 20-gallon high or 20 20-gallon long aquarium. I would choose a 20-gallon long because it’s shallower, which will require less intense lighting for your coral. Also, you get more length out of the aquarium, which could theoretically give you more space for corals and frags. At the end of the day, it’s all about your preference and available space. You can check out the dimensions of these aquariums and many other fish tanks here.

    Water Changing (needed)

    Conducting water changes will be a standard practice with your reef tank. Depending on your system, stocking, and feeding regime, you may need to conduct water changes weekly or every other week. Every system is a little different so it’s important to learn about the nuances and needs of yours. The following are a list of cleaning supplies that I recommend for your 20 gallon reef tank.

    Clean Water

    For the most part, tap water is not going to cut it for a reef tank. If you use tap water, you’re likely going to contaminate your tank with extra nutrients that will cause algal blooms and lower the success of your coral. If possible to set up, I recommend setting up an RO System for your aquarium. A very common and popular brand is the RO Buddie. It’s nice and compact and will create 50 gallons of water per day. You will not need this much daily but it’s nice to have the capacity. If you cannot set up an RO Unit for your fish tank, the next best thing is to purchase distilled water from your local grocery store.

    Saltwater Reef Salt (needed)

    Marine aquariums require a “special” kind of salt. You cannot use table salt or regular aquarium salt for your saltwater fish tank. You will need something like Instant Ocean Reef Crystals, Red Sea – Coral Pro Salt, or many other marine aquarium salts out there. There are a lot of different brands available, I currently use the Red Sea – Coral Pro Salt for my reef, but it’s all about preference. I also recommend purchasing a measuring cup to accurately measure the amount of salt needed when you’re conducting water changes.

    Refractometer (needed)

    We will use a refractometer to verify the proper amount of salt is mixed and that your aquarium has the correct salinity. A well-calibrated refractometer, like this one from Amazon. This tool is very simple to use. You place a little bit of water on the end and look through the eyepiece. You’ll see a color change when looking through the eyepiece, likely a change from blue to white. Where the two colors meet is where your salinity is. You will want your aquarium to be between 1.024 and 1.028 sg. Do your best to keep the salinity stable in your aquarium.

    I would avoid hydrometers for reef tanks. They’re great and easy to use at first, but if they are not properly cleaned and rinsed, calcium deposits build up on them and will lead to inaccurate salinity readings.

    Siphon Hose & Bucket (needed)

    A siphon hose will be great to remove water from your aquarium. You can get a simple Aqueon Aquarium Siphon, a fancy Laifoo Aquarium Siphon, or any other gravel siphon available out there. Besides siphon hoses, you will need buckets to conduct water changes. I recommend having a few 5-gallon buckets and 2-gallon buckets on hand, especially ones with measurements labeled on the side.

    Other Supplies

    Coral Food (recommended)

    Coral are animals, some benefit from getting fed, while others need to be fed to thrive. I recommend feeding corals a variety of foods. My personal favorites are Polyp Lab Reef-Roids and Reef Chili. I will also supplement the coral with the Red Sea Reef Energy Plus AB+. You can make life a little easier by mixing the food with aquarium water in a cup and using a Coral Feeder Syringe to suck up the food then spot feeding the coral. This will help you successfully target feed your coral, to make sure they are getting the food you provide.

    Coral Rx (recommended)

    Parasites and nuisance microorganisms will likely be growing within coral. It’s good to dip your coral to remove parasites before adding them to your reef tank. There are many different types of coral dips available. Here is a great guide from some pro reef keepers on different dips and dosages used.

    Coral Fragging Tools & Frag Plugs (optional)

    Coral grow in many different ways. Some will branch out, others slowly encroach onto surrounding rocks. Regardless, having a coral frag kit around will help you frag the coral. Fragging consists of cutting chunks of rock that hold your coral, splitting coral up by cutting them, or breaking off pieces of coral and transplanting them onto frag plugs. The DDP Coral Frag Kit may come in handy when this time comes. Many stony corals will likely need a more heavy-duty tool like a band saw to create clean cuts and prevent excess damage. Once corals are fragged they will need to be placed on a piece of rock or frag plug to keep them from floating away.

    Super Glue (recommended)

    When you are fragging plugs, you will have to adhere them to something hard, like a rock or frag plug. Super Glue can be used to stick the coral onto these types of surfaces. There are many types of Super Glues on the market, but I recommend Gorilla Glue Super Glue Gel for this task because it runs less and seems less messy than many other glues.

    Water Test Kits (needed)

    All brand-new fish tanks will have to go through the Nitrogen Cycle. If your aquarium is seeded with filter media from an already established fish tank, your Nitrogen Cycle may be very short. Keeping an eye on the Nitrogen Cycle is very important. You will want to test for ammonia, nitrites, and nitrates throughout your cycle. Coral and marine fish are expensive, so it’s important to complete the nitrogen cycle before adding any livestock into the fish tank. After your cycle is complete you will want to continue testing for nitrates, phosphates, carbonate hardness, and pH.

    You’ll be able to check your pH, Ammonia, Nitrites, and Nitrate levels using the API Saltwater Master Test Kit. This kit will help you keep an eye on your water parameters while your aquarium goes through the Nitrogen Cycle. API has made these tests very easy to follow with the instructions. Sometimes the colored results are a little hard to distinguish, but you’ll get a good idea of your water parameter levels. Once you gain some experience and start working with coral, you’ll want to test for things like magnesium which will require more elaborate test kits. Red Sea and Salifert are two companies that make excellent magnesium test kits for aquariums.

    Final Notes

    There is a lot to digest from this article. Startup costs for saltwater aquariums are fairly high, but it becomes easier once you get the ball rolling. There are a million different ways to setup an aquarium. Certain equipment and supplies are must haves and others, like the fragging kit, can be held off on. The reef tank supply list shown in the article is what has worked for me, and I hope it is a good resource for you as well. This hobby is an investment and patience is also a necessity when working with aquariums. The process of setting up a reef tank is shown below to give you an idea of what to expect.

  • Supplies to Setting Up a 10 Gallon Saltwater Reef Tank

    Supplies to Setting Up a 10 Gallon Saltwater Reef Tank

    Most people that venture into this hobby start with a freshwater aquarium filled with colorful gravel and plastic plants. From here, after countless hours of research, many of us venture into planted aquariums or more niche types of fish tanks. The final step for many aquarium keepers is dipping their toes into saltwater fish tanks. This is usually the final step due to the challenges and costs that saltwater aquariums can bring. It is very rewarding setting up a successful saltwater fish tank, and with today’s equipment and technology, it has become much easier than years before.

    This article will focus on equipment and supplies needed to setup a 10-gallon reef tank, but much of what will be discussed can be scaled up to 15 – 20 gallon aquariums.

    Disclaimer Before Continuing

    Before diving into the long list of supplies for saltwater aquariums, there are a few things I want to bring up. First, I would not recommend setting up something this small if it’s your first time creating a saltwater setup. If you’re new to saltwater, I would recommend setting up at least a 25 – 30 gallon aquarium. The easier route is to set up an All-in-One type of aquarium, like the Coralife Biocube, Waterbox Cube 25, or SC Aquariums 24 Gallon AIO. This is mostly because a larger aquarium holds more water volume and more water volume helps keep your water parameters a little more stable.

    My second disclaimer for small reef tanks is that I would personally not recommend adding fish into a 10-gallon saltwater fish tank, especially if you’re new to this. You may be able to get away with a small species of goby like the Yasha Goby or Jester Goby but I would not recommend other fish such as Clownfish, Blennies, or most other species. The space they need and the bio-load they have will make your aquarium harder to maintain. For this aquarium, I would stick to just corals and invertebrates.

    Lastly, if you run this aquarium as an open top, you will likely need to top off your water daily. I have to add about a half cup to a full cup of RO water daily to keep my salinity at 1.024 sg. On top of that, I would recommend also changing about a gallon of water once a week to help remove any nitrates, phosphates, and waste from the aquarium.

    List of Supplies Needed for Aquarium

    There are many different supplies and equipment that can be recommended for your saltwater reef tank. I will provide you a list of things that I have purchased for mine, and that have continued to work for me. I will split the supplies/equipment into 2 categories, things I highly recommend/are needed and supplies/equipment that are optional. I will cover the following in a little more detail:

    • Filtration
    • Lighting
    • Hardscape (live rock and sand)
    • Aquarium
    • Water changing
    • Misc. Supplies

    Filtration (needed)

    For my 10-gallon saltwater reef tank, I decided to use an Aquaclear 70. The intake tube of the Aquaclear 70 may be too long if you choose to have a deep sand bed but I made it work for my setup. It provides a large chamber for filter media and also provides plenty of flow for an aquarium this size. If you’re curious about the other types of Aquaclear HOB filters, check out Fluval Aquaclear HOB Filter – Specs, Dimensions, etc. My goal is to use the large chamber as a refugium in the future, but for now, I have it filled with AQUANEAT Bio Sponge Filter Pad and Aquaclear BioMax. So far, running these two have helped keep my water crystal clear and there is plenty of surface area for bacteria to colonize the filter media.

    Filtration (recommended)

    If you’re not interested in setting up a small refugium in your HOB filter, I recommend Chemi-pure Blue or some form of Activated Carbon media to help remove undesirable contaminants from your water. I would also include the Bio Sponge Filter Media Pad and BioMax listed above. This media and weekly water changes will help keep your water in excellent condition.

    Lighting (needed)

    If you’re looking to grow coral, you will need some type of lighting designed for coral. You do not need a high-end light to grow many different types of coral. I currently run a NICREW LED Light which is a very budget-friendly light, but I also understand the limitations of the light that I am using. You’re welcome to go all out with the Radion G6 LED Light, which has all the bells and whistles, or catch it in between with the NICREW 100 Watts Aquarium LED Reef Light. There are so many different lighting options out there, you just have to find the one that will work best for you and your coral.

    Heater (needed)

    Most marine animals will require aquarium temperatures between 72°F – 78°F. I usually keep my marine aquariums between 76°F and 78°F. A heater will not only raise your temperature to your desired degree, but it will help prevent fluctuations. Stability in water parameters is one of the things you should always strive to have. If you’re looking for suggestions on heaters, check out 6 Best Heaters for Freshwater and Saltwater Fish Tanks. I would also purchase a thermometer for aquariums as a safety check that your heater is working properly.

    Hardscaping With Live Rock & Live Sand (needed)

    Your hardscape is what you will be looking at every day. It’s important to make it look exactly how you want it. In my opinion, live rock and live sand are important additions to an aquarium this small because they create the surface area for bacterial colonies to settle. If possible, I would recommend going to your local fish store to see if they have live rock or dry rock for sale. If they do, ask to simulate the scaping in-store and find the best pieces for you. If you do not have access to live rock at a local fish store, you can find some on Amazon, like the Carib Sea Base Rock or Nature Ocean Base Rock. You’ll likely only need between 10 and 20 lbs. of rock for a 10-gallon aquarium.

    Another thing to keep an eye out for at your local fish store is live sand. CaribSea is often the go-to brand for live sand. I usually try to choose either CaribSea Reef Sand or CaribSea Fiji Pink Sand. Some very fine sands look incredible in reef tanks, but I usually avoid them because of how easily they get stirred up. Similar to live rock, you’ll only really need anywhere between 5 and 15 lbs. of sand for your reef tank.

    Aquarium (needed)

    An aquarium will be needed realistically for any type of setup that requires water. What type of aquarium you choose is completely up to you. My 10-gallon is made by Aqueon. Many other brands make this size aquarium so choose which is available for you. Petco often has discounted aquariums, so you may be able to pick one up for cheap.

    Water Changing (needed)

    Water changes will be the backbone of keeping this aquarium up and running. It’s important to get all the supplies needed for water changes. Everyone has a preference for what equipment and supplies are a necessity, but the following are mine.

    Clean Water

    The first thing that you will need is clean water. As easy as it might be to get water from the tap, it will unfortunately not work well for a reef tank. A saltwater aquarium will do best if you use distilled water or RO water. If you have the money and space to set up an RO unit, I highly recommend it. The RO Buddie is a nice compact Reverse Osmosis Unit that creates roughly 50 gallons of clean water per day. However, there are much larger units you can purchase if needed. It will save you from taking trips to the store. Otherwise, most distilled water jugs from stores provide nearly as good water as RO water.

    Saltwater Reef Salt (needed)

    You can’t use table salt or aquarium salt to create a marine saltwater habitat. You need reef salt. When I first started working with saltwater aquariums I would always use Instant Ocean Reef Crystals. Since then, I have decided to change it up and have moved to Red Sea – Coral Pro Salt. It’s more expensive than Instant Ocean Reef Crystals, but I prefer using the Red Sea Salt. There are many different marine salts available, it will be your personal preference as to which works best. Also, either purchase a measuring cup online or run to your nearest dollar store for a cheap measuring cup. This will be used to measure the amount of salt needed for your aquarium.

    Refractometer

    A well-calibrated refractometer, like this one from Amazon, will be your best friend when it comes to gauging the proper salt level in your fish tank. Avoid purchasing hydrometers if you can, their accuracy diminishes significantly over time because salt particles will stick to the meter and provide an inaccurate reading.

    Siphon Hose & Bucket

    Siphon hoses will be a great tool to have to remove water and/or vacuum your sand bed. You can get a simple Aqueon Aquarium Siphon, a fancy Laifoo Aquarium Siphon, or any other gravel siphon available out there. On top of that, I would recommend purchasing at least two 5-gallon or 2-gallon buckets, preferably with measurements displayed on the side for easy measuring. It’ll make life easier to have a bucket for clean water and a bucket for dirty water.

    Other Supplies

    Coral Food (recommended)

    Once you start adding coral into your fish tank, you’re going to want to feed them. I usually feed mine 2-3 times a week with different types of food. My go-to foods for coral are Polyp Lab Reef-Roids and Reef Chili. I also supplement them with Red Sea Reef Energy Plus AB+. If you’re going this route I would suggest that you also purchase disposable pipettes or a Coral Feeder Syringe. This will help you successfully target feed your coral, to make sure they are getting the food you provide.

    Coral Rx (recommended)

    Coral from different pet stores, online shops, or even the same pet store can be full of different nuisance critters and parasites. Coral Rx is a concentrated coral dip, and giving your coral a dip in Coral Rx will help eradicate the parasites before you place them into your reef tank. Coral Rx is the one I commonly use, but there are a multitude of dips out there. Here is a great guide from some pro reefkeepers on different dips and dosages used.

    Coral Fragging Tools & Frag Plugs (optional)

    If your aquarium is running successfully, your coral will likely grow into surrounding rocks. A time may come when you need to frag your coral. Fragging consists of you cutting chunks of rock that hold your coral, or breaking off pieces of coral and transplanting them onto frag plugs. The DDP Coral Frag Kit may come in handy when this time comes. Many stony corals will likely need a more heavy-duty tool like a band saw to create clean cuts and to prevent excess damage. Once corals are fragged they will need to be placed on a piece of rock or frag plug to keep them from floating away.

    Super Glue (recommended)

    When you are fragging plugs, you will have to adhere them to something hard, like a rock or frag plug. Super Glue can be used to stick the coral onto these types of surfaces. There are many types of Super Glues on the market, but I recommend Gorilla Glue Super Glue Gel for this task because it runs less and seems less messy than many other glues.

    Water Test Kits (needed)

    When you set up a fish tank of any kind, it will go through a nitrogen cycle. It could last anywhere between a couple of weeks to over a month. If you seed your aquarium with bacteria from a well-established fish tank, the cycle should be much shorter. Regardless, it’s very important to monitor the progress of your nitrogen cycle, as well as monitor water parameters afterward. You will want to test for ammonia, nitrites, and nitrates throughout your cycle. After your cycle is complete you should test for nitrates, phosphates, carbonate hardness, and pH in your reef tank, but I would at least start with nitrates, phosphates, and calcium.

    An API Saltwater Master Test Kit provides the kits needed to test for pH, Ammonia, Nitrites, and Nitrates, which will get you through that nitrogen cycle. API makes fairly easy-to-follow test kits, which are very beginner friendly. There are other things to test for like magnesium which will require more elaborate test kits, like Red Sea’s Marine Care Test Kits, and Salifert test kits. I highly recommend checking them all out.

    Final Notes

    This is an incredibly long list of supplies I believe is important to your reef-keeping journey. These are simply recommendations. Not everyone will agree with my choices, but there are a million ways of doing one thing correctly. I left out equipment like protein skimmers and UV sterilizers from this list because I do not think they are necessary for a setup this small. You will replace both those pieces of equipment with water changes. If you have any comments or suggestions on more guides, please send me an email at atparium@gmail.com. I will have an article ready soon on the steps to setup a reef tank, but for now I have attached a video of the process below!

  • 10 Gallon Freshwater Equipment List For Beginners

    10 Gallon Freshwater Equipment List For Beginners

    The 10 gallon aquarium is the starting point for many fish hobbyists. It’s a fish tank that will fit a handful of fish and also visually appealing without breaking the wallet. It’s the perfect size for smaller bedrooms, countertops and large enough where it should not be as challenging as smaller fish tanks. This guide will provide information on equipment and items needed to setup a 10 gallon aquarium. Each image has a link attached which will take you to the product’s sale page.

    Aquarium Glass

    First, we must start with the 10 gallon aquarium. For this guide, we chose the Aqueon 10 Gallon Aquarium with clear silicone. Aqueon is a great company and makes great fish tanks.

    Needing the aquarium is pretty self explanatory, we need it to hold the water and give your future fish a home! This aquarium is 14 x 23.75 x 16.5 inches.

    Filtration

    Filtration makes aquarium keeping a little bit easier by sucking up extra food and fish waste. There are two different types of filters we recommend for this type of setup. We recommend either using a hang on the back filter or a sponge filter. They both function differently and each have their ups and downs and we will give a little information about both.

    The Aquaclear 30 is our preferred filtration system for a small nano aquarium such as the 10 gallon. This hang on the back filter is quite easy to install and it provides mechanical, chemical and biological filtration.

    This filter achieves mechanical filtration using water flow and running it through filter pads or filter floss. It also reaches chemical filtration by running water through activated carbon. Lastly, biological filtration is present because beneficial bacteria forms colonies in the filter.. The Aquaclear filter is compact. Also, the majority of its housing is out of the aquarium which leaves more space inside for decorations and swimming space for fish. The flow is adjustable and the Aquaclear 30 is rated up to 30 gallon of water so perfect if you ever decide to upgrade.

    The sponge filter has the capability of reaching the mechanical and biological filtration but not the chemical. It is a big sponge and quite a bit of beneficial bacteria will find home in it.

    Besides lacking chemical filtration, the only other downside is that an aquarium air pump and air line tubing must be purchased with a sponge filter. The air pump sits out of the aquarium with a tube that goes into the fish tank and gets inserted into the sponge filter.

    Whichever is chosen is determined by personal preference. Both sponge filter and HOB filter will aid in keeping your nano tank clean.

    Heaters

    Our preference for heaters is the Fluval M50. It is rated for fish tanks up to 15 gallons and has an adjustable control dial which is convenient.

    This heater is fully submersible, wires and all. The only thing that should not be submerged of course is the outlet plug. It’s a sturdy heater and we personally have had great success in using this one.

    It also has a mirrored finish to help blend it to the environment surrounding it.

    Lighting

    A great budget light for your aquarium is the Finnex Planted+ 24/7 LED Light. This fixture will illuminate your nano aquarium with customizable & controllable green, red, blue, and daylights.

    Furthermore, the Finnex light fixture will give you the right amount of light to potentially grow plants in your 10 gallon fish tank. A remote is also included with the light fixture to program your lights to your needs. This light fixture can handle medium to high light demanding plants.

    An even bigger budget light fixture is the NICREW ClassicLED aquarium light. The NICREW light does not carry the same bells and whistles as the Finnex fixture but still can pack a punch for the price.

    This light fixture has a nice low profile and extendable legs but unfortunately does not have a controller to program the light for your desires. This light fixture should be able to handle medium to high light demanding plants.

    Final Notes

    Hopefully this guide will provide you enough information to setup the skeleton of your fish tank. There is still much to add such as gravel, decorations and things like fish food and extra filter media. For information on items needed for your fish tank take a look at our setup guide here. The guide will provide a good foothold to starting and setting up your fish tank.

  • Putting Together Your First Freshwater Jarrarium!

    Putting Together Your First Freshwater Jarrarium!

    Putting together a jarrarium, as simple as it may seem, can be intimidating at first. Luckily, once all the material is collected it becomes really simple. It seems to be a growing hobby and it is quite a lot of fun to put together. This is a step-by-step jarrarium guide that will hopefully give you a good idea of how to put together an eye-catching jar.

    Due to their small footprint, a jarrarium will begin to look quite cluttered when adding equipment. A preset heater is highly recommended to help keep a stable water temperature, but it is not required if your residence is consistently at a set temperature. Adding filtration is not too common. Many jarrariums rely on water changes to maintain good water quality.

    Step 1: Finding a Container

    We of course need to begin with acquiring a jar for the new jarrarium. Glass containers are most commonly used. I have seen old glass bottles, vases, ice buckets, and so many more things used as a jarrarium. I do my best to have my jar be at least 1 gallon but smaller or larger is always a possibility.

    The most important thing is to make sure that the container is clean! DO NOT use soap when cleaning. At most use vinegar and then thoroughly rinse the container. Once the container is ready we can move on to the next step.

    Step 2: Adding Soil

    Once we have the glass ready it is time to add some soil! I would recommend adding organic soil with compost into your jar. Avoid soils with fertilizer because it may add undesirable nutrients to your jarrarium. Also, certain soils with fertilizers may not be good for the inhabitants of your new jar. While adding the soil be sure to compact it down in an attempt to remove any air bubbles. About an inch of soil should be present once it is compacted.

    Once the jar is up and running it is highly recommended not to disturb the soil portion of your setup. In a few steps we will be adding a “seal” to prevent the soil from getting out but for now, let’s move onto adding the hardscape.

    Step 3: Adding the Hardscape

    Many different types of hardscapes can be used for a jarrarium. I used a piece of driftwood when I was putting together this one. Be mindful that it is preferred to boil or soak your driftwood before adding it into an aquarium or jarrarium otherwise, it runs the risk of releasing tannins into the enclosure. The tannin is not dangerous but it causes the water to look yellow or brown for a long period. Large pieces of driftwood can be used or spindly spider wood can be used.

    Rocks are also commonly used for an enclosure. Be mindful, because rocks that are made of limestone will raise your pH and water hardness levels, which may be undesirable when keeping live plants. Common rocks that are used are river rocks or lava rocks. Check out local fish stores for rock options.

    Lastly, a jarrarium can have any aquarium decor that will fit into it for decoration. A tiny pirate ship, skulls, pillars, etc. are fair game but make sure that it will fit or at least not crowd the whole enclosure. With any of the decorations, make sure that it is firmly touching the bottom of the jar for stability.

    Step 4: Adding the Seal

    Now is the time to add substrate to seal the soil. I recommend adding 1″ of a substrate on top of the soil. In this jar, I used Fluval Stratum, but other substrates can be added such as the Eco-Complete planted aquarium substrate!

    The substrate will seal the soil in place to help prevent it from floating up and leaching nutrients but it will also allow plant roots to reach down there and use what nutrients are in the soil. We will have to be careful when adding water to not disturb the soil and substrate!

    Step 5: Adding a Portion of Water

    Steps 5 and 6 can honestly be interchanged. I chose to add roughly a third of water into the jarrarium before adding plants. I did this to see whether my substrate sealed the soil correctly and I also wanted to have some water in the jar before adding plants. As stated above, be sure not to allow your substrate to be disturbed! You do not want the soil to get kicked up.

    Allow the water to run down your decoration or create a strainer to let the water trickle down. A cheap way to make a strainer is to poke holes in the bottom of a plastic bottle and pour the water into there. The water will probably get a little murky. After a few days, most of the murkiness should settle.

    Step 6: Planting

    Adding plants is probably my favorite part of putting together a jarrarium. It brings the enclosure to life! You can always experiment with many different plants but to start I would recommend adding a low light Anubias, some riccia for the foreground, and perhaps some java moss. This is a great way to dip your toes into keeping live plants in an aquarium-type setting.

    In this enclosure, I have dwarf hair grass and moss but I am only experimenting to see how well they do. If they do not grow well I may swap out the dwarf hair grass with an easier-to-keep plant.

    Step 7: Filling to the Top

    Now it is time to finally fill this jarrarium to the top! Use your strainer or piece of decoration and slowly and gently fill it with water. Once the water has reached your desired height, you are done with setting up your new jarrarium!

    The jar may be murky or discolored. Give this a few days to pass. The substrate and the tiny soil particles will settle and the coloration should clear up! Throw in a few pieces of fish food to begin the nitrogen cycle and begin considering what livestock to add to the enclosure. Also, consider adding an artificial light source and avoid having your jar too close to a window. A light fixture with a CFL bulb will suffice. There isn’t a need to go out and spend hundreds of dollars on a light fixture. Being so small with the potential of having swinging water parameters we will be limited to what can be added to the jar. I would only recommend small shrimp and snails for anything smaller than 5 gallons. At 5 gallons a betta fish could be added with a heater.

    Final Notes

    There are a few things I would highly recommend purchasing when setting up a jarrarium or any aquarium for that matter. An API Freshwater Master Test Kit can be used to keep track of ammonia levels, nitrates, and so on. This is important for really small enclosures such as this. It is also important to have while your jarrarium is going through the nitrogen cycle which takes roughly 6 weeks. During this time we will allow the food we threw in to decompose and we will not add any livestock. Only top off the water as it evaporates and do not replace any water during the cycle. The nitrogen cycle is completed when your test kits read 0 ammonia, 0 nitrites, and a hint of nitrates (10 ppm).

    A water conditioner, like the API Tap Water Conditioner, is recommended if using tap water to remove unwanted chlorine from your water. This will help make the water stable for your little critters. Other than that, just a few things like shrimp food, nets, and buckets should be kept. Lastly, enjoy experimenting with your new jarrarium! Hopefully, this guide gave a good idea of how to put one together!

    Check out this video of me putting together this jarrarium:

  • Setting Up a GloFish Specific Aquarium

    Setting Up a GloFish Specific Aquarium

    Setting up an aquarium can be as simple or as complicated as you would like to make it. This will be an in-depth guide on how to set up a fish tank specifically for Glofish Tetras and/or Glofish Danios. This guide is primarily for beginner aquarists who are dipping their toes into the hobby or for parents who need guidance on setting up an aquarium for their children. For some quick information on GloFish check out this guide!

    We will be using a 20-gallon aquarium as a point of reference for this setup guide. A fish tank this large will allow you to keep a few more fish and a larger water volume will help keep water parameters stable. Under normal circumstances, an inch of full-grown fish per gallon is the recommended ratio for keeping fish in an aquarium. GloFish Tetras and GloFish Danios max out at 2.5 inches. This will allow you to keep either 8 tetras or danios. This is great because both are schooling fish and it’s recommended to keep at least 6 to consider it a school.

    Equipment Required

    No matter what type of aquarium you set up, you’ll likely need at least one piece of equipment to keep it running. Once you become a pro, you are welcome to change things up and tweak the equipment to your liking. However, if you’re new to fish tank keeping, I recommend following along to learn about the equipment I recommend for your fish tank.

    Aquarium Heaters

    We will need a heater. The 75-watt Eheim fully submersible heater or the Fluval M100 Submersible Heater are great choices. These heaters are fully submersible so you can easily hide them behind the decor. Also, they can be calibrated to the desired temperature using the dial at the top. As with any piece of equipment, it can come faulty or become faulty over time. I highly recommend purchasing something like the Penn-Plax Therma Temp Floating Thermometer to keep an eye on the temperature in case your heater decides to fault out. If you need more heater suggestions, take a look at some of the Best Heaters for Freshwater & Saltwater Fish Tanks!

    Filtration System

    A good filter is always recommended. My preferred filter for a setup like this is the Aquaclear 30 Power Filter. I like this one because it has three different compartments where filter media can be added. It comes included with a sponge, carbon, and biomax. First, the sponge catches debris. The sponge will require replacement eventually but rinsing it in aquarium water during water changes will keep it going for a while.

    Second, the carbon absorbs nutrients and will need to be changed once a month. Lastly, the biomax creates a bacteria haven which is important to aid in keeping a stable aquarium. These can be swapped out with other filter media but they are also perfectly fine to use for your Glofish aquarium. Unlike other filters, this one maximizes the space to assist in keeping your water clean!

    Aquarium Lighting

    Blue lights are what will make your Glofish pop in color. We will need a light that can be set to just blue lights to make your fish glow! Fancy lights can get expensive. Luckily there are budget lights that should do the trick for this kind of setup. The Hygger 18w Aquarium LED Light will provide you with both normal lights (to help live plants grow) and a setting to let only the blue lights shine.

    If you want to go all out and splurge on a more elaborate light the Current USA Satellite Plus Pro LED Fixture is a great choice. It comes with a controller which allows you to program the lights and also use preset settings to create different effects like cloud cover and storms. Purchasing this light will also give you the ability to grow more difficult plants in your aquarium if you ever decide to go that route.

    Optional Equipment

    Aquarium Air Pump

    An air pump is not a requirement but it adds a cool effect to the aquarium. Connecting it to compatible decorations or creating an enormous bubble wall creates a more unique aquarium experience.

    Auto Feeders

    Auto feeders are not usually something I recommend but they are also an option for anyone who travels and isn’t always home to feed the fish. I don’t normally recommend them because they will at times overfeed or dump most of the food at once which can create terrible spikes in phosphates and nitrates in your aquarium which can be terrible for your fish.

    Decorations for GloFish Aquarium

    The next thing on the list for setting up a GloFish tank is the decorations. My recommendation for a GloFish aquarium is dark gravel with little hints of coloring. Either completely black gravel or one with a little bit of color. If you plan on keeping plants, a deeper gravel bed will be needed, but otherwise, an inch-deep gravel bed should do just fine. For a 20-gallon fish tank, you’ll probably need anywhere between 10 and 20 lbs. of gravel.

    Image by Jim Zamichieli on wikimedia

    Since we are putting an aquarium together specifically for GloFish having fake plants that will glow under blue lights is recommended. These plants will give the aquarium an “out of this world” feeling. Loading the aquarium with quite a few fake plants is great!

    Adding some hardscape into your aquarium is important. Adding just plants won’t give structure to your fish tank. It is important to have something solid to create a nice structure and shape. Things like rocks, driftwood, sunken ships, and others are fantastic ways to bring your fish tank to life.

    Other Must Have Items

    There are a handful of items that I would recommend having ready to go while setting up your aquarium.

    Test Kits

    The API Ammonia Test Kit and API Freshwater Master Test Kit are important because your new aquarium will be going through the nitrogen cycle. The cycle goes through and once completed will provide the bacteria required to keep your fish safe. The cycle begins with a spike of ammonia. Then that converts to nitrites and lastly, the nitrites get converted to nitrates. You’ll likely know the Nitrogen Cycle is completed when you test for 0 Ammonia and Nitrites and you’ll likely see a hint of Nitrates. The nitrogen cycle normally lasts 6 weeks but the process can be sped up to about two weeks by using a bacteria starter, or media of some sort from an established aquarium.

    Aquarium Water Conditioner

    A water conditioner, like API’s Tap Water Conditioner, is useful to remove chlorine from the water before adding it to the aquarium. Large amounts of chlorine are bad for your aquarium’s inhabitants. API’s water conditioner is fairly straightforward. You will only need to add water conditioner to the water being added. If you change out 5 gallons of water, you only need to add water conditioner for 5 gallons worth of water. You do not need to add water conditioner for the full 20 gallons of aquarium water.

    Gravel Vacuum

    A gravel vacuum, like the Laifoo Aquarium Siphon, will be a must-have when water changes are conducted. The gravel vacuum is probably one of the easiest ways to remove water and clean your gravel. This one specifically is nice because it has a siphon ball which will help create a siphon. This will help you avoid getting a mouthful of water if you decide to start a siphon manually.

    Net, Food, Glass Cleaner

    A net and food are pretty self-explanatory. The net is to make adding the fish into the aquarium easier and the food of course is to feed the fish. Lastly, the glass cleaner will be very useful for cleaning the glass! Algae will form on the glass over time so having an aquarium-safe sponge is beneficial. I sometimes use an old gift card to clean my glass, or I treat myself by using a Melamine Sponge to clean hard-to-reach spots in the fish tank.

    Setup Process

    To begin, place your aquarium in its desired location. Gently begin adding gravel into the aquarium. Be sure not to drop the gravel from great heights because the glass could shatter.

    Since the fish tank is empty, it’s okay to add water conditioner before or after the water is put into the fish tank. While filling the aquarium to about 30% of the water capacity begin brainstorming where to put your aquarium decorations and heater. Once 30% water capacity is reached, begin placing your decorations, and be sure to wedge your hardscape decor a little bit so it is firmly in its place.

    After your decorations are in place fill your aquarium with water to about 90% capacity and place your power filter in the center back of the fish tank. Having it in the center will provide the best performance and circulation. Also, now would be the time to add the heater. Turn the dial to the desired temperature (76 – 78 degrees Fahrenheit) place it and angle it to your preference but be sure it is submerged underwater. Test out the filter and make sure it runs correctly. Once the filter begins to work continue filling the water until the fish tank is filled. Then turn on the heater and set up the light fixture.

    I normally recommend allowing the aquarium to run for at least 24 hours. I do this to make sure all of the equipment is running properly and also just to make sure there are no leaks in the aquarium. I would add API Quick Start to your aquarium. This contains nitrifying bacteria that will be necessary for your new aquarium. It will hopefully speed up the nitrogen cycle and will make your aquarium safer for new arrivals.

    Final Thoughts

    API Quick Start should help you get through your Nitrogen Cycle quickly. I would recommend looking into the Nitrogen Cycle before beginning any sort of aquarium setup. You are working with live animals, so it is important to conduct the proper research before deciding whether to keep them in your home. Unfortunately, many people forget that.

    Lastly, look into adding some snails and/or shrimp to add a clean-up crew after your Nitrogen Cycle has completed. They’re great at eating algae and uneaten food! Otherwise, I hope this guide helps with setting up a brand-new GloFish aquarium!

    Image by Robert Kamalov on wikimedia

  • Setting Up a Simple Freshwater Aquarium

    Setting Up a Simple Freshwater Aquarium

    This guide will help brand-new aquarists set up their first freshwater aquarium. This article is relevant for aquariums that are 10 – 30 gallons in size. Aquariums come in all shapes and sizes, with different decorations, plants, filtration systems, and more. This will be a very basic setup guide to help new fish keepers get started. We will cover the steps needed for the actual setup and equipment that can be used for the aquarium.

    Equipment Needed

    To begin, the main equipment needed to keep an aquatic system running are the glass enclosure, heater, filter, and light. These are must-haves, especially if you are just starting. An air pump adds more oxygen but it should not be necessary for this type of setup because the filter will provide enough oxygen for fish to thrive.

    • A submersible heater, like the Aqueon Pro Series Heater, is an excellent option for heating your aquarium because it is made by a very popular brand and is built incredibly well. If you’re not interested in the Aqueon Pro Series Heater, check out some of the Best Submersible Heaters for Freshwater and saltwater Aquariums.
    • A hang-on-the-back filter, such as the Aquaclear Series (power filter) is also a great choice for a filtration system because it allows for chemical, mechanical, and biological filtration. You can check out other Hang-on-back Filters by following the link.
    • LED lights, such as the NICREW ClassLED Aquarium Lights are a good budget light that will open the door for aquatic plants in the future. They provide great lighting, usually last years, and don’t use too much electricity. Make sure the size of the LED light matches the length of your fish tank.

    Decorating & Jump Starting Your Aquarium

    Having a nice gravel bed is a great way to make your fish tank pop! I prefer dark gravel, like this one on Amazon, because that will make the colors of the fish tank stand out more. For first-time aquarists, I usually recommend black aquarium gravel. Just remember to rinse the gravel before putting it into your fish tank. Do not use soap, just water. Adding 1 lb. of gravel for every gallon of water will create a nice deep gravel bed, adding a nice look to an aquarium. However, it’s not necessary to add that much.

    Purchasing decorations is a great idea! There are many different types of decorations such as plastic plants, driftwood, pirate ships, and so on. If you enjoy Halloween, take a look at some Halloween-inspired aquarium decorations. The types of decorations are limitless. I recommend Easy to Care for Live Plants and driftwood to give a natural look, but to each their own.

    A few other things needed for a new aquarium are an API Freshwater Master Test Kit, water conditioner, gravel vacuum, net, and fish food (flake food and pellets), and glass cleaner (sponge or magnetic).

    Setup Process

    The setup process is the fun part of it all. Once you have all your tools and equipment, it’s time to finally put together your new aquarium. I will continue by discussing aquarium placement and decoration recommendations below.

    Aquarium Placement

    Once everything is purchased and ready to go it is time to start setting up the aquarium. Find a location in the house away from windows and air/heating vents. Windows provide more sunlight than needed which will cause algal blooms to occur and air/heating vents may cause temperature fluctuations in the aquarium which is not desirable.

    Adding Gravel & Water

    Gravel and decorations should be rinsed before placing into the enclosure. Once that is done begin by gently putting the gravel at the bottom of the aquarium. Place the water into a bucket and add water conditioner to remove chlorine from it. Usually, 1 drop of water conditioner is added per gallon of water but it may vary so double-check the instructions on the bottle you are using. The water temperature does not matter so much right now but try to eyeball the temperature to be around 74° – 78° Fahrenheit. Fish will not be added yet so an exact temperature isn’t necessary. Repeat these steps until the aquarium is roughly 50 – 75% full and begin adding the decorations.

    Placing Decorations, Equipment & Final Touches

    Push the base of the decorations to the bottom of the gravel bed. This will give it a solid foundation and will help prevent it from moving when cleaning the enclosure. Place the heater and set the temperature to around 76 -78 degrees Fahrenheit. Place the filter in its proper location. Continue to fill up the aquarium to about 90% and test to see if the filter runs. I usually recommend letting the aquarium run for about 12 – 24 hours just to make sure all the equipment runs properly and to ensure there are no leaks. Before adding fish, read up on the Nitrogen Cycle, and the highly recommended fishless cycle.

    Purpose of API Freshwater Master Test Kit

    I will explain the reasoning behind purchasing the other items for your aquarium. The API Freshwater Test Kit is important. The aquarium will go through the nitrogen cycle. The cycle will help create a safe environment for fish and invertebrates. The cycle begins with a spike of ammonia (from waste). The ammonia will convert to nitrites after a week or two. You will use the test kit to follow along. Visible signs of nitrites will appear. After 5-6 weeks, the nitrites should convert to nitrates. When using the test kit, the ideal spot to be in is to test for 0 ammonia and nitrites and have just a hint of nitrates. The nitrogen cycle normally lasts 6 weeks but the process can be sped up to about two weeks by using a bacteria starter.

    Use of Water Conditioner

    A water conditioner is useful to remove the chlorine from the water before adding it to the aquarium. Large amounts of chlorine are not good for fish or invertebrates so removing them is a bonus. Some people allow their water to sit in a bucket for 24 hours before adding it to their fish tank but to be safe the water conditioner is the way to go!

    Supplies For Aquarium Maintenance

    The gravel vacuum will be a must-have when doing maintenance on your aquarium. After creating a siphon, the gravel vacuum will allow water to flow down the tube and into an external bucket. The flow is slow enough to help collect food particles and fish waste but it should not suck up the gravel that was recommended earlier in the article. Using a gravel vacuum makes water changes a breeze.

    The net and food are pretty self-explanatory. The net is to make adding the fish into the aquarium easier and the food of course is to feed the fish.

    Lastly, the glass cleaner will be very useful for cleaning the glass! Algae will form on the glass over time so having an aquarium-safe sponge is beneficial.

    Final Notes

    Aquarium building can be fun while still keeping it simple. Once experience levels increase the hobby can branch out to far reaches. Starting with an easy-to-care-for 10-gallon aquarium creates a good foundation for what could be a lifelong hobby in the future.